

How to create a campaign in Boostified Pay
Review of the campaign form and tips on how to create the best possible campaign.
5 min reading
Step 1
First of all, you choose the country in which you want the campaign to be promoted (all countries in the list are included in your price).
Then choose how many people you want to work with in this particular campaign. Note that this is a figure that is only visible to you and is not set in stone - you can choose, for example, 20 participants here and still accept 30 participants once you have received applications for your campaign.

Step 2
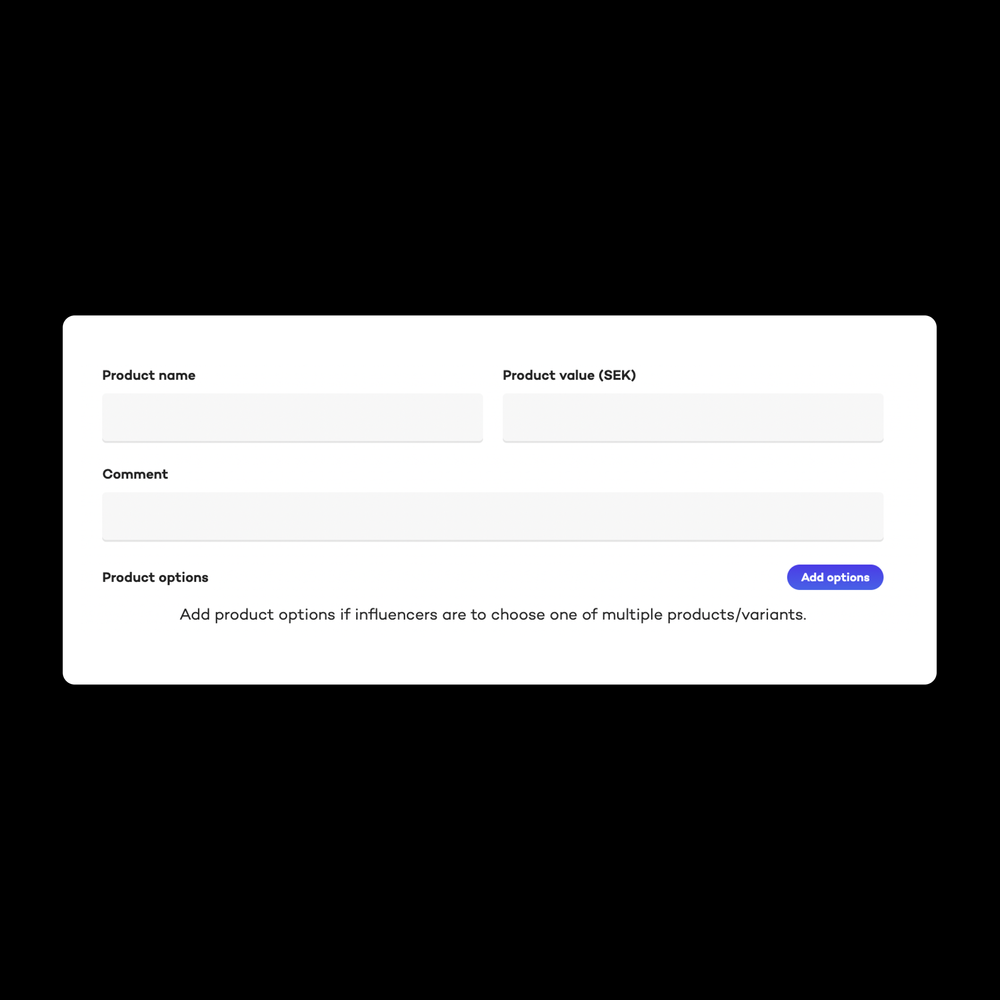
Then choose the product/service you want to send out. Enter the name of the product and its market value in SEK. NOTE - if each participant receives more than one product, enter the total market value of what they take home. You can also add a short comment about the product if you wish (you can add a more detailed description of the product further down).
Here you can also add any product options if the participants, for example, are to choose the colour, size, model or other aspect of the product they receive. Then click on "Add options" and fill in the fields that come up.
Note: If you add product options, participants must select an option to even apply for your campaign.
-
The product value you send out is entirely up to you, but remember: the product value is the participants' payment. So: the higher the product value, the more you can ask for in return AND higher product value usually = more applications.
Many factors go into the number of applications and what you can ask for in return, but it's definitely worth thinking about 🙌🏻
The product options can help you with many things - only your imagination sets the limits!
For example, if you can/want to deliver your products only to selected cities, you can have the different cities as product options. This way you ensure that they actually live in a place you can deliver to.
Step 3
Here you choose the name of your campaign. The name will be one of the first things a profile sees before they click on your campaign to read more. Therefore, remember to make it clear but preferably a little nice / light-hearted.
The start date is the date participants can start publishing their entries. Not when the campaign is published for application. Deadline is in turn the last day participants can publish their post. How long they should have is up to you.

Step 4
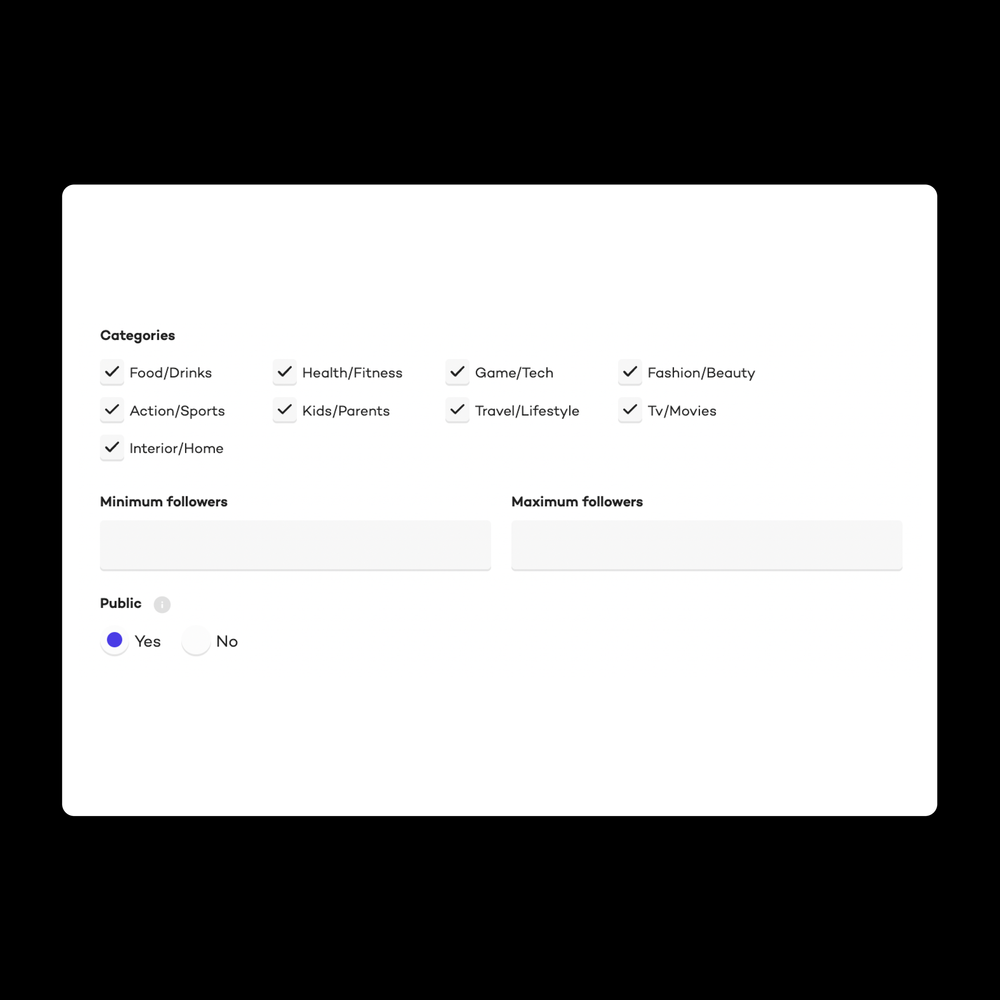
Choose the category that best fits the product/service you will be sending out.
Here you can also choose to set a limit on how many followers you need to have on Instagram to apply to your campaign. You can set both a minimum and a maximum number.
Then choose whether you want your campaign to be public or not. Anyone can currently download Boostified's app and view current campaigns on the Boostified Marketplace (but must then become a member to apply for specific campaigns). If you don't want anyone to be able to see your campaign, tick "No", otherwise let it be public - this gives you more visibility.
-
We always recommend our customers to test not to set a limit for minimum followers. For example, if you set a limit of 2000 followers and there is someone with 1990 followers who perfectly matches your brand, they may not even apply to your campaign because of the barrier and you will miss out on a possible perfect match.
Try it without! In the end, you choose which ones you want to work with.
Step 5
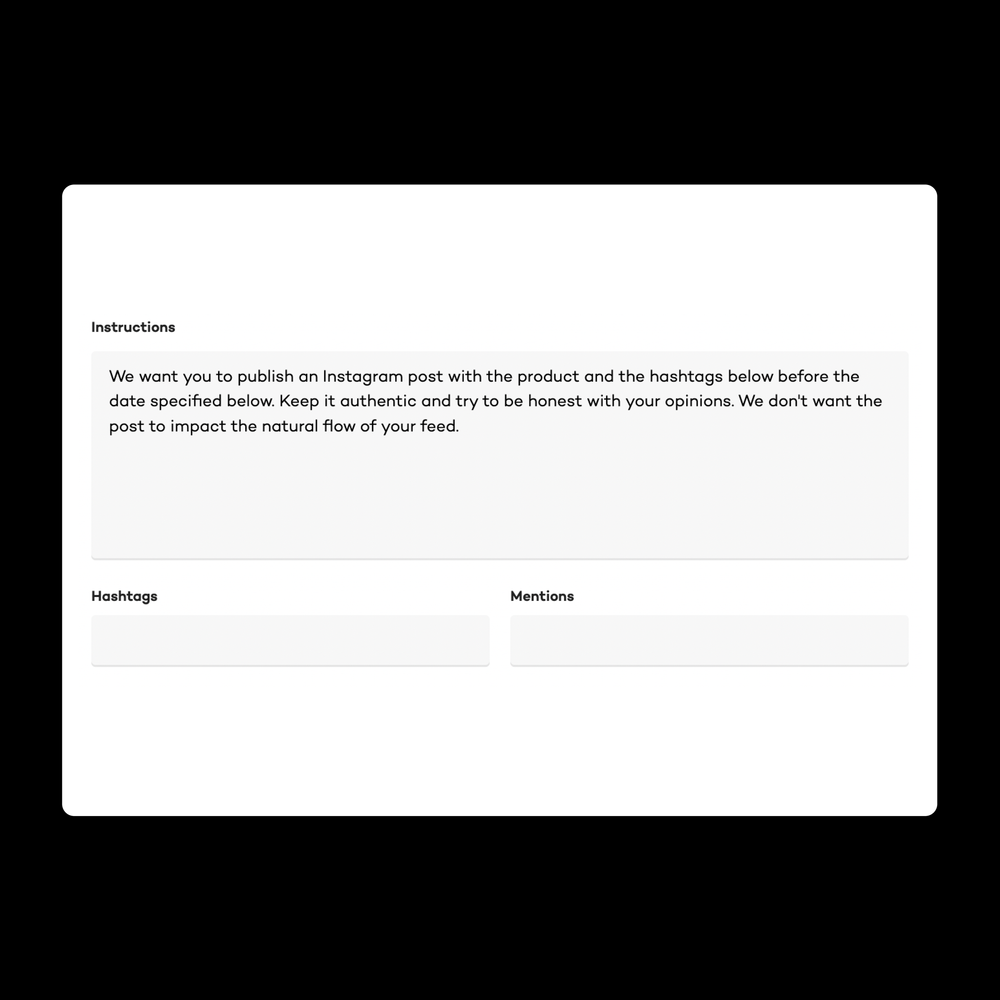
Now we have reached one of the most important steps - the instructions for your campaign. Here you write the do's and don'ts for the material you want in exchange for your product/service. Include:
What do you want them to include in the caption?
What do you want to appear in the image/Reelen/Storyn?
What feeling do you want them to convey?
Does your campaign have a particular focus/theme?
Is there anything you absolutely do not want to be included or visible in the material? (e.g. no black and white images, no competing brands, etc.)
Note: When a person submits an application to your campaign, they are agreeing to a contract that includes following the instructions for the campaign. So this part is important for you to get the result you want.
Hashtags and mentions:
Enter the hashtags you want participants to include in their post, we recommend 1-3 hashtags. Keep in mind: the hashtags are also what allow our platform to technically upload the posts and its statistics, so preferably don't make them too complicated.
The same goes for mentions; enter the account you want to drive traffic to. Preferably only 1, but 2 is fine too. Too many accounts can get messy.
-
It's great to be clear and have concrete instructions, but remember: creators know their followers and know what engages and what fits into their flow, so let them be creative and adapt the content to their personal style
Step 6
Now you are almost ready!
Upload 2 images showing the product/service you are sending out. One of the images can be an inspirational image that shows participants what their material could look like.
Note: Image #1 is the first thing to appear (along with the campaign name) when the campaign is up for submission on the Boostified Marketplace and on your Collaboration Page. Therefore, please feel free to have a nice environmental image (if you have one) as image #1 and image #2 can be a more clean product image.
Step 7
Last step!
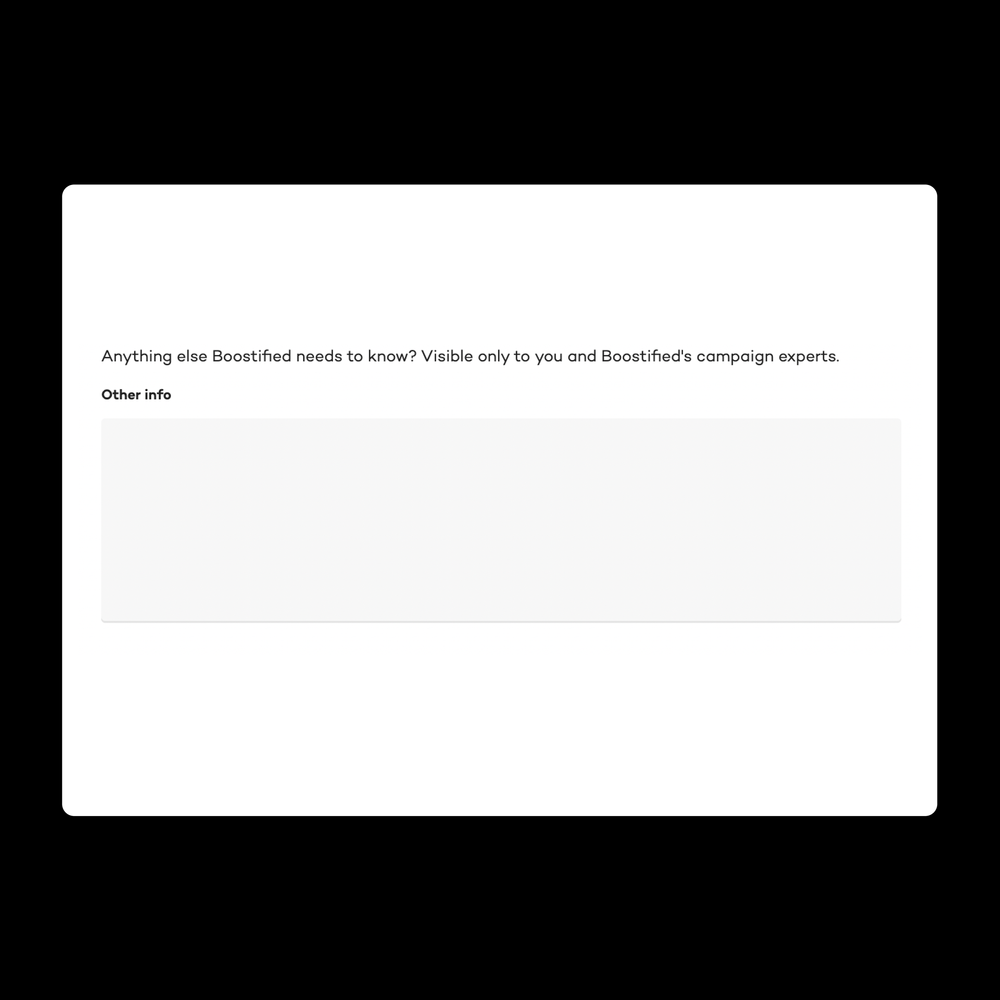
This is a field that will not be publicly visible anywhere to those applying for or participating in your campaign and is completely optional to fill in. Think of this as a digital post-it note! Here you can write things that you need to remember yourself or that you want us at Boostified to know for some reason.
For a campaign to be save as a draft the following field need to be filled in:
Country
Campaign name
Start date
Deadline
Still have questions?
Write to us in our support chat, which you can find at the bottom right of the platform.